Monday, August 25, 2014

Golden Beets


I wanted to name this post "We've got the beet, we've got the beet, we've got the beet...yeah! We've got the beet", but thought it was a bit too corny (though I will be singing this song for the rest of the week!)

So right now we are starting to enjoy our golden beets.  What are these you ask?  Well, the are a beet that is golden in color and a bit more sweet than a regular red beet.  They are one of my all time favorite foods.  Plus you don't look like you have killed someone when preparing them.

I find the best way to prepare these beauties is to really look simply.  No fuss, not a lot of seasoning, no vinegar or pickling, just clean and simple.  Here are two of the best, easiest and most delectable ways I know to enjoy this amazing vegetable.  Find some at your local farmers market or grow some yourself for next year and you won't be disappointed.


Simple way 1:

Cut off the tops, peel and finely chop into a salad. (Doesn't get easier than that does it?)

Simple way 2:

Cut off the tops, (peel if you want to), coarsely chop.  Place in aluminum foil or baking pan that has been greased (I usually grease with a bit of olive oil).  Drizzle a bit of olive oil on top of the chopped beets.  Add a touch of sea salt.  Fold up aluminum foil into a packet and cook on the grill at medium heat for 20-25 minutes or until tender.  If baking in the oven, cover the pan with foil and bake at 350 degrees for 20-25 minutes or until tender.


FYI: If you choose not to peel the beets before cooking, once they are cooked, the skins will slip right off.

So please enjoy this fantastic veggie if you can find them.  They are worth the price at the market and definitely worth growing yourself.  I am anxious to create a recipe using them with my spiral food slicer! Look for that in the next few weeks!

Enjoy!

Shelley Allen
Health Coach, MS OTR/L
or follow me on Instagram @shelley_allen24
or Twitter @shelleyhealth1

Tuesday, August 19, 2014

Self Care

How healthy we feel is not just related to the food we eat - though that can be a huge part of how we feel in many ways (physically, psychologically and emotionally).


Feeling "healthy" also requires some form of self-care.  This can come in many forms and can be different for everyone.  Spending quality time with family, yoga, enjoying nature, reading a good book, finally cleaning that one spot in your house that's been driving you insane, knitting, exercising, swimming, spending time with friends, ... all ways of achieving self-care.

As I get older I find that what used to bring me peace has changed to a degree.  Though I still enjoy time reading, I now find that having quality time in nature with my family is generally just as healing (as long as my boys aren't pestering each other incessantly).

Finding these times to decompress, unplug, and achieve some fleeting peace can impact our mental health, how we carry our weight, and impact how well we sleep.

So this weekend I cleaned bookcases, organized papers, helped clean the garage and helped torch our kids old fort.  It felt incredible to make such progress on areas of the house and yard that have been nagging me for most of the summer.

Today, I brought my kids to our family camp to have some quality time swimming, boating and fishing with Nana and Grampa before school starts.  As a way to have more of that quality self care time, instead of working, I took the time to join the family on a boat ride around the lake.  It's amazing how refreshed I now feel after sharing this adventure with my kids.
On Cobbossee Lake.

I want to encourage all of you to find, recapture, or discover what self-care activities help bring you that sense of peace, calm and fulfillment.  Take the time this week to enjoy that sensation for a minimum of 20 minutes and examine how you feel after such an activity.  Then, work towards achieving that 20 minutes each week, then each day, and you may feel a sense of peace pervading your work day as well.

In peace and wellness.

Shelley Allen
Health Coach, MS OTR/L
or follow me on Instagram @shelley_allen24
or Twitter @shelleyhealth1

Friday, August 15, 2014

Blueberry Season

Well I have to say how fortunate I feel to live in Maine.  We are blessed with the ocean, mountains, lots of forests, lobster and wild blueberries.

Our town has a hill called, appropriately, Blueberry Hill, where anyone in the town can come and rake or pick wild blueberries.  (I just learned today that these are never sprayed with any chemicals...a great bonus!) This is an amazing opportunity for individuals to stock up on this sweet and tender little treat.  However, as we want to use as many of these antioxidant packed beauties as we can, all winter long, we head down the road to the next town and a great little place to rake organic wild blueberries - Staples Homestead.

My husband, who knows no speed of operation except warp speed, usually heads off by himself to rake our berries when the season is in full swing (a two to three week window starting August 1).  Last year he was able to rake 10 gallons of berries in an hour.  And though this may seem like a lot, this was one of the first years that we actually ran out of berries in the freezer by May.  This year, determined not to experience the same scenario, Mark headed out and came home with a whopping 17 gallons of berries in a little over an hour.

The consequence of this abundance is a week of preserving blueberries.  I was able to freeze 213 cups of berries for use all fall, winter, and spring in smoothies, as toppings for yogurt, and an occasional pie or crisp.

My eldest son Benjamin, who would turn into a blueberry if he could at this time of year, has probably consumed 3 quarts of blueberries this week.  (Just think of all the consequences due to that amount of consumption...).

10 jars of blueberry jam.
I made a batch of blueberry jam (10 jelly jars worth), that we will use all year for lunches.  Blueberry buckle and blueberry crisp have been devoured consumed...and now I am feeling, well, blue (and I am not just referring to my semi-permanently stained fingers).

Part of me feels like we need more for fresh eating now!  I see muffins, a pie, and another crisp on the menu for at least another week.  Another part of me feels anxious about running out of jelly or frozen berries before we can rake again next year.  What am I to do?

As I contemplate sending my husband back to rake again, I will leave you with the recipe for my blueberry crisp.  We enjoyed it with friends last evening and I hope you will enjoy it too!

Ingredients:
4 heaping cups of blueberries
2 tbsp. cornstarch (we use an organic, non-GMO variety)
1 tsp. cinnamon, divided
1 tsp. vanilla
1/2 c. sugar
1 1/2 c. quick oats
1/2 c. sliced almonds, crushed
2 tbsp. brown sugar
1/4 c. softened butter

Preheat oven to 375 degrees. Pick your blueberries clean of stems and leaves (as much as possible).  Place them in a medium size bowl.  Add cornstarch, 1/2 tsp. cinnamon, 1/2 c. sugar and 1 tsp. vanilla and mix gently until well combined.  Let set for 15 minutes.  Meanwhile, in a separate bowl, combine oats, almonds, brown sugar and softened butter.  Combine with a fork until all the mix is moistened by the butter.  Pour the blueberries into a medium sized ceramic, glass or Corning Ware pan.  Sprinkle the oat mixture on top and bake for 30 minutes.  Let cool, but serve warm.  

Enjoy!  (As I type this out I think I will go get more berries....)

As an FYI, domestic and imported blueberries make the top 25 list of fruits and veggies found with the most pesticide residue, according to the Environmental Working Group.  We always try to find these organic.  It typically is a bit more expensive, but I wanted to let you know.  You can find their complete list at this link: Dirty Dozen


Shelley Allen
Health Coach, MS OTR/L
or follow me on Instagram @shelley_allen24
or Twitter @shelleyhealth1


Wednesday, August 13, 2014

Save the Carrots


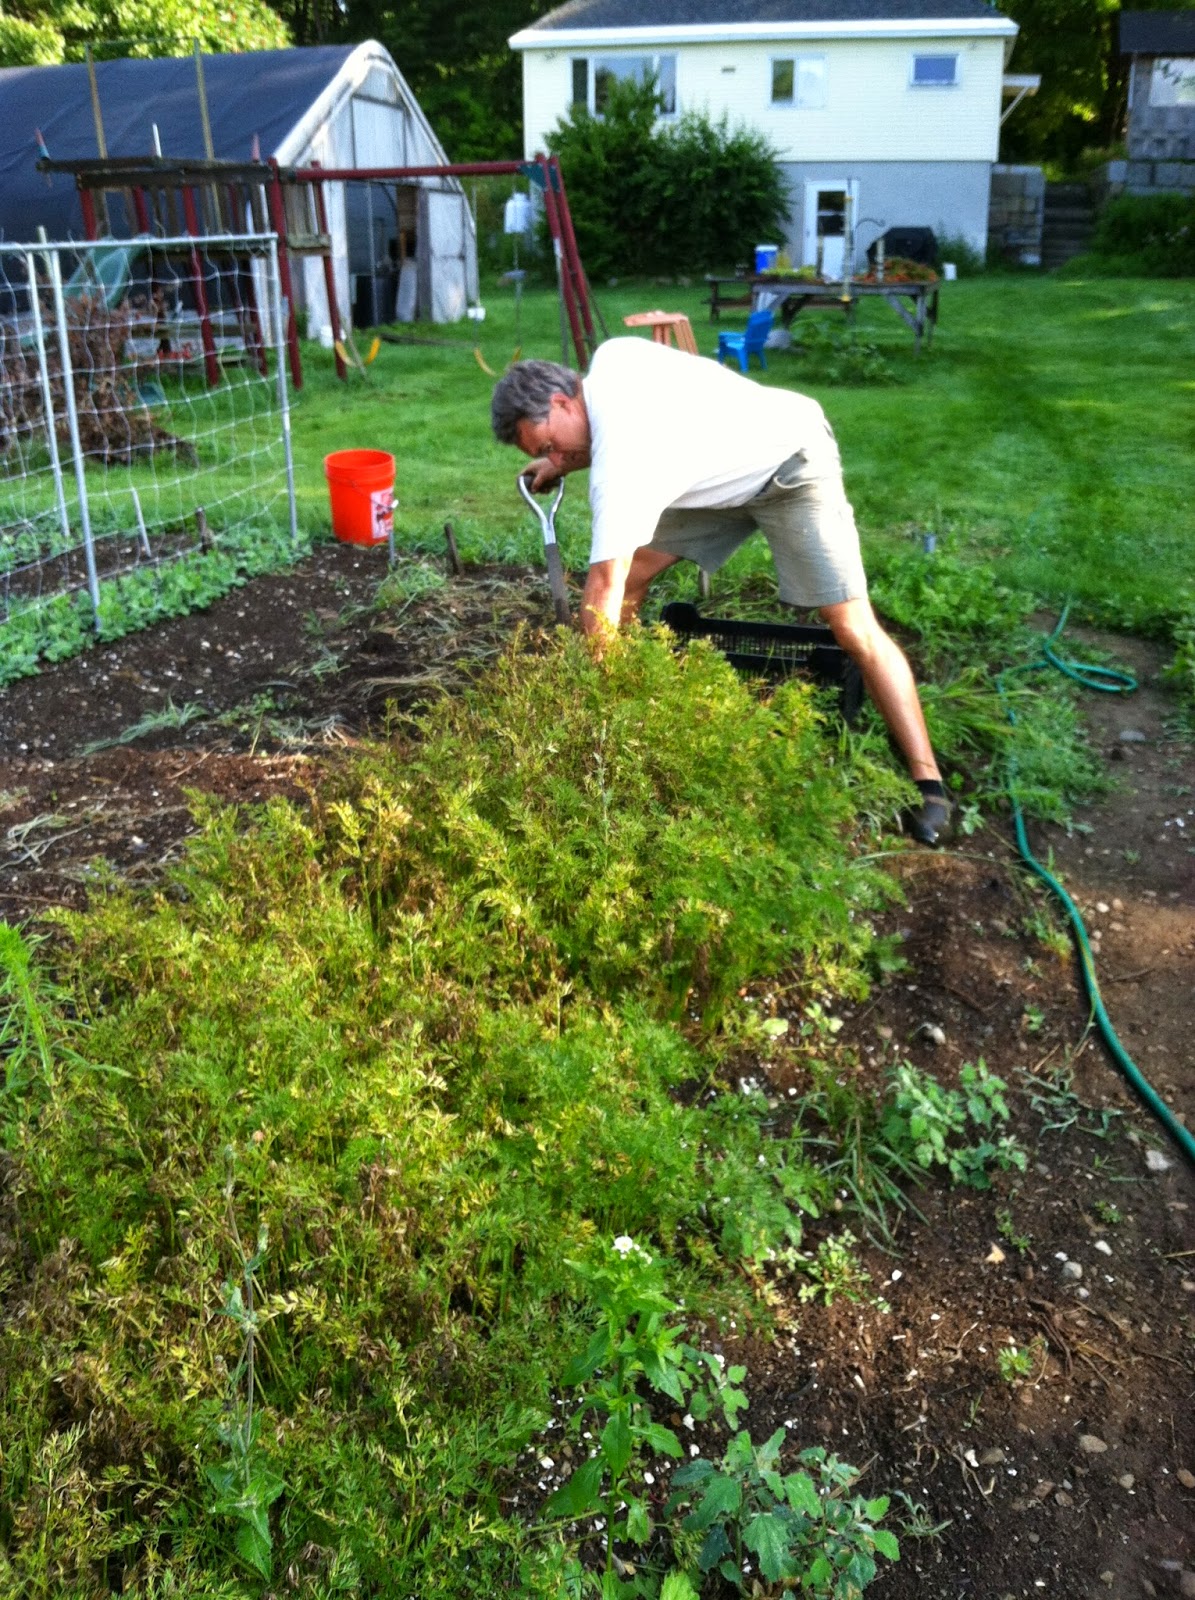
As I sit here typing, my husband Mark is out in the garden pulling up yet another 30 foot long, 3 foot wide row of carrots for us to store for winter.
Mark digging carrots.

Two days ago he harvested the same size row and I was able to put 140 pounds of carrots into our walk-in cooler to await the winter months.

Yes I know that is an insane amount of carrots.  Yes I realize that adding another 140 pounds will mean enough carrots to potentially feed all our friends through the winter months.

What am I to do with all these carrots?!
Washed carrots drying in the sun.
Fortunately, we have built a walk-in cooler that stays at 35 degrees all year long.  Most of our carrots we wash, dry, and store in large bags and they will stay fresh until spring.  We will use these for fresh eating, chop them for soups, stews, shredded carrot salad (I will post this recipe soon), juicing, smoothies and anything else we can think to use them in.

Though I love having these whole carrots to use, there are times where I simply feel too pressed for time to chop.  Anyone else ever feel this way?  I mean I want to eat my veggies but there are moments after a long day at work and chasing around kids that the idea of washing and chopping some carrots for dinner feels like too much work.  So, I decided to do two things during this harvest time.

First, I washed about 7 pounds of carrots (because I have the time and energy now), and prepped them for quick and easy use this winter.

 About half of the carrots I sent through the largest shredding blade on my KitchenAid food processor.  I used our Cabela's vacuum sealer, and sealed and froze these in 2 cup batches and will use them in soups and casseroles.

Carrots grated on the large blade. 

The second batch I put through the smallest shredding blade on my food processor and vacuum sealed and froze these in 1 cup batches.  These will be for use in muffins and baked goods during the winter months.

Carrots grated on the small blade.
There are other ways to save your harvest abundance in addition to the brief ways I have already mentioned.

Before we had a walk-in cooler, we had a root cellar.  We would layer carrots between thin layers of sand and store them in 5 gallon buckets for use throughout the winter.

You can also blanch, chop, and freeze your carrots for your dinner dishes later in the colder months.

Two other methods for storing carrots are canning and dehydrating.  The Ball Blue Book of Preserving has great recipes and instructions for canning any vegetable you can think of.  Some of their suggestions for carrots are Glazed Carrots and Savory Carrot-Fennel Soup.

I sliced, blanched and dehydrated 5 trays worth in my dehydrator this week as well.  I am thinking of drying some other veggies and adding herbs to make soup or dip mixes.  I will let you know how that all comes out.

As I head outside to help Mark prep these next 140 or so pounds of carrots, my head will be thinking of new recipes and ideas for preserving.  What is your favorite way to preserve carrots for the winter months?

Shelley Allen
Health Coach, MS OTR/L
www.facebook.com/yoursensationalself
yoursensationalself@gmail.com
or follow me on Instagram @shelley_allen24
or twitter @shelleyhealth1


Tuesday, August 12, 2014

Recipe: Oatmeal and Almond Breaded Chicken


One of those household staples that seems to be the hardest to find alternatives for are breadcrumbs.  I mean bread crumbs are made of bread right?  What is a wheat sensitive girl to do when making meatloaf, or meatballs, or spinach gnocchi, or even breaded chicken?

I confess that I haven't tried the rice equivalent for breadcrumbs.  When I read the ingredients I sometimes am overwhelmed and it seems so foreign a concept that I shy away.  Well tonight I made "breaded" chicken and created my own breading.  It came out delicious and seemed way better then even traditional breaded chicken.

It is not gluten free (I have found that I am definitely wheat sensitive, but not oat), so if you are gluten sensitive/intolerant I would love to know how you would modify this.  Please post and share!

Ingredients:

1/4 c. sliced almonds, crushed                
1/2 c. quick oats
1 heaping tbsp. ground flax seed
1 tsp. Table Blend Mrs. Dash
Pinch of sea salt
1 egg beaten
2 boneless chicken breasts

Combine first 5 ingredients in a shallow bowl.
Place beaten egg into another shallow bowl.
Cover both sides of chicken with egg.  Add chicken to oatmeal and almond mixture and coat well. Place on a greased baking dish and bake at 375 degrees until chicken is done 25 minutes or so depending on the thickness of the chicken.

This had a great crunch and the chicken was nice and moist.  My kids even liked it!


Friday, August 8, 2014

Dehydrated Spiral Sliced Zucchini Spaghetti

In honor of National Zucchini Day!


So many of you know that my new favorite kitchen toy is my spiral vegetable slicer by Paderno.  I have made some delicious zucchini "spaghetti", spiralized the beets for my Green Bean and Beets with Sliced Almonds recipe, and made an interesting raw salad with zucchini, summer squash and carrots.

As zucchini season is in full gear, and I can't stand seeing anything go to waste, I am constantly looking for ways to use this versatile vegetable.  I have at least 20 pint size bags of pureed zucchini in the freezer for breads and muffins.  And we grill, spiral, or chop it at least four times a week for various dishes...and still they keep coming!

So I thought why not try to dehydrate the spiralized zucchini and use it in the off months in place of pasta?We grow spaghetti squash so I will have those as well for my pasta substitute, but again, I am looking for ways to save the harvest now.

So I spiralized a bunch of zucchini and summer squash.  Placed them in the Excalibur Dehydrator and low and behold, I have dried "spaghetti"!  Here are some pictures of the process.  As I begin to make dishes with them in the fall I will make sure to post how they look and let you know how they taste!


Here's a link to a site giving you some of the nutritional benefits of this overabundant yet great veggie!


Wednesday, August 6, 2014

Carrot Oat Muffins


This is a recipe that I adapted from the cookbook, Whole Grains for a New Generation by Liana Krissoff.  I made these as a way to use up some of the carrots we are harvesting from our garden, and as snack or breakfast ideas for the kids as the starting day for heading back to school is looming closer.  


Here are the ingredients:

1/2 c. milk
1/2 c. plain Greek yogurt
1 c. quick or rolled oats
1/3 c. melted, unsalted butter
1 c. whole wheat flour
1/8 c. ground flax seed
4 tsp. baking powder
pinch of salt
1 tsp. ground cinnamon
1 large egg
1 tsp. pure vanilla extract
1/4 c. honey or sugar
1 c. finely grated raw carrot

In a large bowl, combine the milk, yogurt and oats and set aside to soak for 45 minutes if using rolled oats, and 20 minutes if using quick oats.
Yogurt, milk, and oatmeal


Preheat oven to 375 degrees.  Generously butter a 12 cup muffin tin or line the cups with cupcake liners. (My recipe actually made 15 muffins so be prepared for a couple of extras).

In a large bowl, whisk together flour, flax, baking powder, salt and cinnamon.  To the oats mixture add the egg, vanilla, sugar or honey, butter and carrots and whisk until mixed well.  Add to the dry ingredients and stir with a spatula until just combined; do not over mix.  Spoon into prepared tin filling each one almost to the top.  Bake until a toothpick inserted in the center comes out clean and the tops are brown (about 20-25 minutes).  Rotate the muffin tin half way through cooking.  When done, loosen the edges and transfer to a wire rack to cool.  Muffins will keep in an airtight container at room temperature for 3 days.  

I will keep mine in the fridge after a day or so and reheat as needed.  My plan is to freeze them as well and take out for snacks or breakfast when school starts.  

FYI.  This is a nicely moist recipe but not super sweet.  My eldest son liked them, my youngest thought they were not quite sweet enough.  I used honey in my recipe but the original recipe called for sugar.  I have found that  one way to trick my kids sweet tooth is to add a touch more cinnamon to a dish or a dash of nutmeg.  Generally they will then not complain about something tasting "like nothing"!

Let me know if you try them and what you think!   

Shelley Allen
Health Coach, MS OTR/L
www.facebook.com/yoursensationalself
yoursensationalself@gmail.com
or follow me on Instagram @shelley_allen24
or twitter @shelleyhealth1

Tuesday, August 5, 2014

5 Easy Ways to Spend Less on the Grocery Store


I am appalled every time I  go to the grocery store and see the total cost of my purchase.  Even when I take the small cart or the hand basket, I seem to hardly ever be able to leave for under $100.  As the shell shock of the grocery tally wears off, I think of all those people who depend on the grocery store for everything: vegetables, fruit, meats, dairy, snacks, drinks, breakfasts...I, who am fortunate enough to grow all my own vegetables and raise my own meats, find it hard to fathom what kind of bills everyone else is seeing at their local supermarket.

These excursions always inspire me to find ways to use more and save more at home.  I thought I would share 5 simple steps you can take that would help decrease your bill the next time you have to buy groceries.

1.  GROW YOUR OWN


As gardening season is in full swing here in Maine, I think about how much money my family saves by growing our own veggies.  Though we have about 1/2 an acre in cultivation, we did not start with so much land or quite the diversity of crops that we enjoy now.  Our first garden was a 4 x 8 plot outside our apartment where we planted one cucumber plant, a few tomatoes, a pepper plant and some fresh herbs. This small space helped to ease the amount of money we spent at the store and provided us with superior nutrition compared to the items shipped all the way from California or Argentina.  If you don't have that amount of space, you can grow many veggies in planter boxes (peas, tomatoes, cucumber, peppers, herbs). Even growing a bit of your own food can help diminish the shock at the end of the conveyor belt.

2.  BUY IN BULK

Buying items in bulk can seem expensive at the time of purchase, but when spread out over all the meals or times of use, it really is a great deal.  I think the biggest reason many don't buy in bulk is they feel they don't have the storage space for large amounts of food or other items (though the Sam's Club parking lot is always jammed when I go). If you can find the space for storage, buying larger quantities will, in the end, cost you less money.  My family buys, household staples in bulk, such as toilet paper and tissues.  We also, through membership in a food buying club, are able to buy food staples in bulk such as flour, rice, sugar and oatmeal.

3.  MAKE A MENU

One of the most effective ways to save money at the grocery store is to not go everyday.  Making a weekly menu before shopping and buying only the items needed to create those delicious meals is an effective way to save money.  I try to make a weekly menu that takes into account what is seasonal, local and can be used in multiple ways.  For example, if I cook a ham then I have 3-4 other meals planned with the leftovers.

4.  USE LEFT OVERS

Which takes us to point 4, use your leftovers.  There are a multitude of ways to use leftover meats from your dinner for lunch the next day.  Use steak, ham, or chicken diced in a salad, or mixed with a bit of dressing for a sandwich.  Keep the leftovers for dinner instead and make a soup, or casserole.  Vegetables can be reheated for lunches or added to casseroles or soups as way to be recycled.  And don't overlook leftover grains such as rice, quinoa or barley as a breakfast option.

5. CUT BACK ON PREPACKAGED FOODS

Perhaps the biggest impact on your grocery budget can be made by cutting back on the amount of packaged food you purchase and cooking with whole foods.  Yes Minute Rice and Potato Flakes are quick and convenient but you also lose any nutritional value and help to contribute to an expanding waist line in addition to an expanding grocery bill.  Try cooking brown rice, or even white rice if you prefer, without the 5 minute variety.  Steam or saute fresh vegetables in a bit of chicken or vegetable broth instead of buying canned.  Cut back on the amount of chips, crackers (our household downfall), soda and snacks by even 2 boxes a week and you will notice a difference at the register.

By implementing these small changes, I hope that you find that you too can diminish the sticker shock associated with grocery shopping.  For ideas on how to use leftovers, and recipe ideas keep an eye on this blog, follow me on Twitter or Instagram and find me on Facebook.

Shelley Allen
Health Coach, MS OTR/L
or follow me on Instagram @shelley_allen24
or twitter @shelleyhealth1


Saturday, August 2, 2014

Green Beans with Beets and Sliced Almonds


Another fun night with the spiralizer. I have been looking for new veggies to turn into beautiful fun spirals and found out that the beets work amazingly well. As I still try to find simple yet delicious ways to cook from the garden, this was an easy choice.

I started with 2 handfuls of pole beans (though string beans will work just as well ).


I trimmed the stem ends off the beans and added them to about 1-2 inches of water in a large saute' pan. I cooked these at med. high heat for about 5 minutes . I then removed them from the water and put them in a serving bowl.

While they were cooking I peeled the beets and ran them through the spiralizer .


 I emptied the water from the cooked beans and added 1-2tsp. of olive oil to the pan, I heated the oil briefly at medium heat and added 3 tsp. garlic. We LOVE garlic in our house so some of you may find 1 -2 tsp. of garlic is sufficient for your tastes. I quickly sauteed the garlic for 30 seconds then added the spiraled beets. These I stirred together for about 5 minutes until the beets were just warm. I then added 4 sprigs of fresh thyme , and sea salt and pepper to taste.


 I transferred the beets onto the green beans and sprinkled with 1/4 cup of sliced almonds.  This dish had amazing flavor and was very simple to make - Start to finish time was under 15 minutes.


Hope you try this and enjoy it as much as my family did (and yes my boys even ate it)!

Shelley Allen
Health Coach, MS OTR/L
www.facebook.com/shelley.p.allen
www.facebook.com/yoursensationalself
yoursensationalself@gmail.com
or follow me on Instagram @shelley_allen24
or twitter @shelleyhealth1